Connect WordPress

Lead Generated allows for seamless integration to your WordPress websites. Form submissions are instantly available within Lead Generated as they are submitted from your website. Once they are in our system you can take advantage of our powerful reports, search, and sorting filters. In addition, our spam filters are very powerful and will make form submission spam messages a non-issue for you and your agency.

Current Supported Form/Page Builders

  • Beaver Builder
  • Brizy Builder
  • Caldera Form
  • Contact Form 7
  • Divi Page Builder
  • Elementor Page Builder
  • Gravity Forms
  • Gutenburg
  • Ninja Forms
  • SmartForm
  • Thrive Theme Builder
  • TypeForm
  • WP Fluent Forms
  • WP Forms

WordPress Connection Alternatives

Don’t see your form or page builder listed? No problem, we have workarounds. We are continually adding more integrations for WordPress so if you would like yours to be added submit it as a feature request through our ticketing system here: Submit a feature request

If you do not have one of these you can still get all of your form submissions into our system without an issue. Below are two workarounds that will work with Lead Generated 100% of the time.

Step by Step Guide

Lead Generated Settings

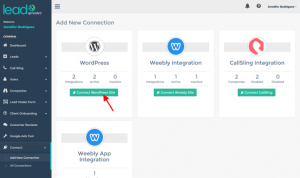
1. Log in to your Lead Generated account. Click on “Settings” on the left menu, then “Integrations”.

2. Click on “Connect to WordPress Site”.

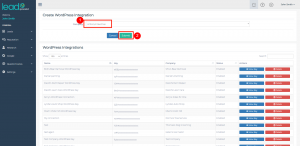
3. Select the company from the select box that you would like to connect with Lead Generated and click the submit button.

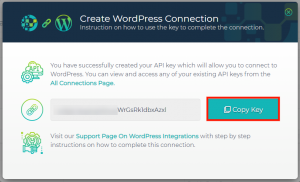
4. Click the copy key button from the popup menu.

WordPress Settings

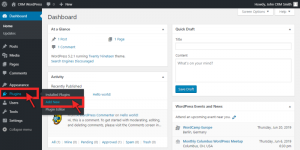
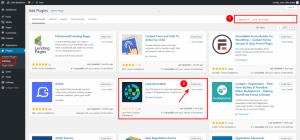
5. Log in to the admin area of your WordPress website. Click on “Add New” under “Plugins” on the dashboard menu.

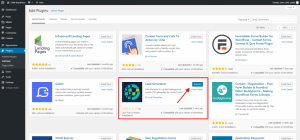
6. Search for and install the Lead Generated Plugin

7. Click on “Activate Plugin”.

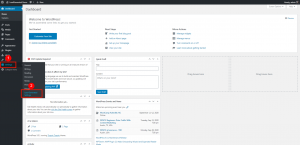
8. Choose settings from the WordPress Dashboard menu and Select the Lead Generated Option.

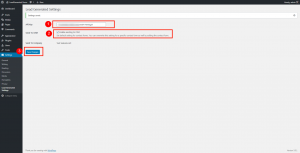
9. Paste the API key you copied from Lead Generated into the “API Key” field in the Lead Generated Settings page within the WordPress dashboard. Make sure the “Enable sending to CRM” checkbox is checked and click the Save button. After clicking the save button you should see the company you created within Lead Generated listed in the Send to Company field.

Test the Connection

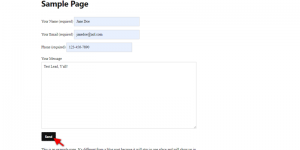
10. Send a test form submission to Lead Generated from your website.

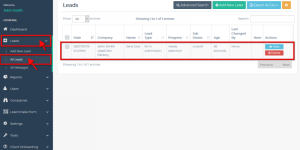
11.  Within Lead Generated expand “Leads” from the left navigation and click on “All Leads”. You should see your test form submission on all leads screen. If you do not see your form submission check the connection settings as well as the spam filters within Lead Generated.

Next Steps

Now that you have successfully connected your WordPress Site. Here are a couple of next steps you should do to make sure things are set up correctly.

Connect Weebly

Google is incorrectly identifying our Weebly script as malicious software which can cause your ads to be suspended. Please refrain from using our Weebly Scripts with Google Ads until we have a resolution.
Sorry for the inconvenience, we are working hard to get this resolved ASAP.
For now, the workaround is using this Zapier Connection.
Sincerely, Lead Generated Support Team

In this article, you will learn how to connect your Weebly website to LeadGenerated. This connection will allow the form submissions from your website to show up within Lead Generated. If you are using the Weebly script this should happen instantly.


Why Connect Weebly to Lead Generated?

There are many reasons to connect your websites to Lead Generated. The first and move obvious reason is so that you can track the performance of your websites and have all your leads in one location. Once the leads are in our system you can start taking advantage of all the powerful sorting, searching, and reporting features. In addition to the organization and reporting features the spam filters built into Lead Generated are very powerful and can save you a ton of time. The spam filters learn as you go and can adjust based on the patterns you see in your spam messages.


Beware of Google Ads

If you are using Google Ads then our Weebly Script can cause some issues. Google Ads incorrectly identifies our script as something potentially harmful to your site because it is sending your form submissions data to a third party, Lead Generated. In many cases, this is not what you want but obviously, in this situation, it is exactly what we want. This is the only product that we are aware of that has an issue with our script. So if you are not running ads through Weebly then this should not cause any problem at all. If you are running ads to a page on your Weebly site we have several workaround options that will allow you to connect to Lead Generated without an issue.

Google Ads Workaround Options

Step By Step Guide

1. Login to Lead Generated. Click on “Settings”, then “Integrations”.

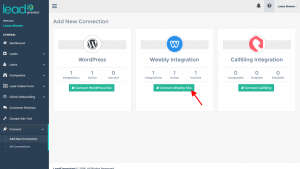
2. In the Weebly box, click on the “Connect Weebly Site” button.

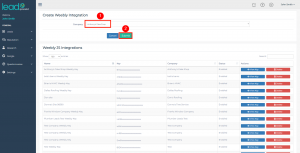
3. Select the company that you would like to connect from the company select box and click submit to create the Weebly script.

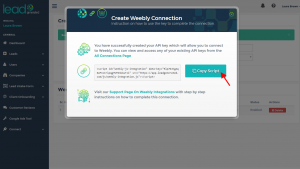
4. Copy the script generated for you by clicking the copy button.

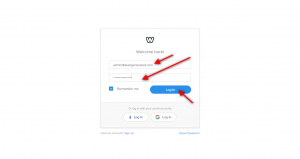
5. Login to your Weebly account.

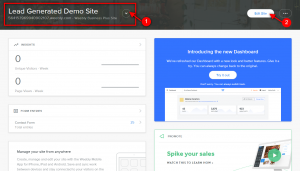
6. On the top right menu, select the website you’d like to connect to LeadGenerated, then click on “Edit Site”.

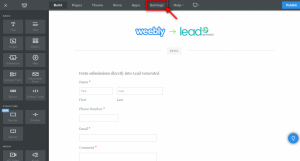
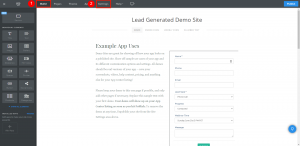
7. On the top menu, click on “Settings”.

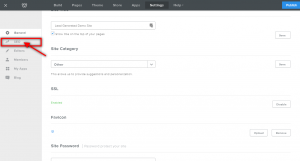
8. On the left menu, click on “SEO”.

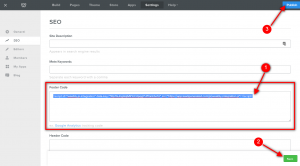
9. Paste the script copied from LeadGenerated into the “Footer” area of your website.  We recommend making the Lead Generated Weebly script the first piece of code within the footer code area. So if you have an existing one add our code above the existing one. Next, click the save button in the lower right corner and then the publish button in the top right corner.

10. As a final step, it is a good idea to click on the build menu option and then click back to Settings and SEO to ensure the Weebly code was saved properly. If you do not see the Weebly script in the footer code area then it was not saved properly and it will not work until it is saved correctly in this area. If you see the script is not showing in the footer area of the SEO settings after returning from the build area paste the code in again and make sure to click both Save and Publish as shown in steps 8 and 9.

Next Steps

Now that you have successfully connected your WordPress Site. Here are a couple of next steps you should do to make sure things are set up correctly.

Embed Form

Google is incorrectly identifying our embedded form as malicious software which can cause your ads to be suspended. Please refrain from using our Embedded Forms with Google Ads until we have a resolution.
Sorry for the inconvenience, we are working hard to get this resolved ASAP. For now, the workaround is using this Zapier Connection.
Sincerely, Lead Generated Support Team

This guide is an overview of the embed form option. The process is pretty simple, first, you build and customize a form within Lead Generated. Next, you copy a small piece of code and it onto your website. Wherever you paste the code that is where your form will appear. This creates a direct connection to Lead Generated. As users fill out the form on your website their submissions will be available immediately within our system.

Video Overview

Benefits of the Embed Form Option

  • Can work with any type of website
  • Quick and easy to set up
  • No software conflicts with Google Ads
  • Allows country-level IP address filtering
  • Form submissions instantly available within Lead Generated

Website Forms

Before we dive into the embed form option, it is necessary to have a good understanding of website forms. We will cover it briefly here but it is recommended that you read through the website forms documentation to gain a solid understanding of the role they play within the lead management module and how they relate to embedded forms.

Every company has an associated website form. When you first created your company you were given a choice of which form to use. You can create, edit, or change the website form at any time. Your website form is composed of fields, these fields align with the fields on your website. For each new field that you create on a website form, it creates a column, similar to a column on a spreadsheet to store values from your website. These columns are able to searched, filtered, sorted, and used in reports throughout the lead management module. It is recommended to reuse the same fields in different forms whenever possible.

The website form associated with your company is the starting point of your embedded form. From the edit form page, you can customize the visibility of the fields as well as the types of fields and their options. The integrations page will allow you to further control the behavior of the embedded form and styling through the use of custom HTML or CSS.

Step by Step Guide


Creating an Embed Code

You will first need to go to the Integrations module in the left-hand navigational menu. Click on Settings, this will expand and provide you further options. Then click on Integrations and you will see a screen similar to the one below.

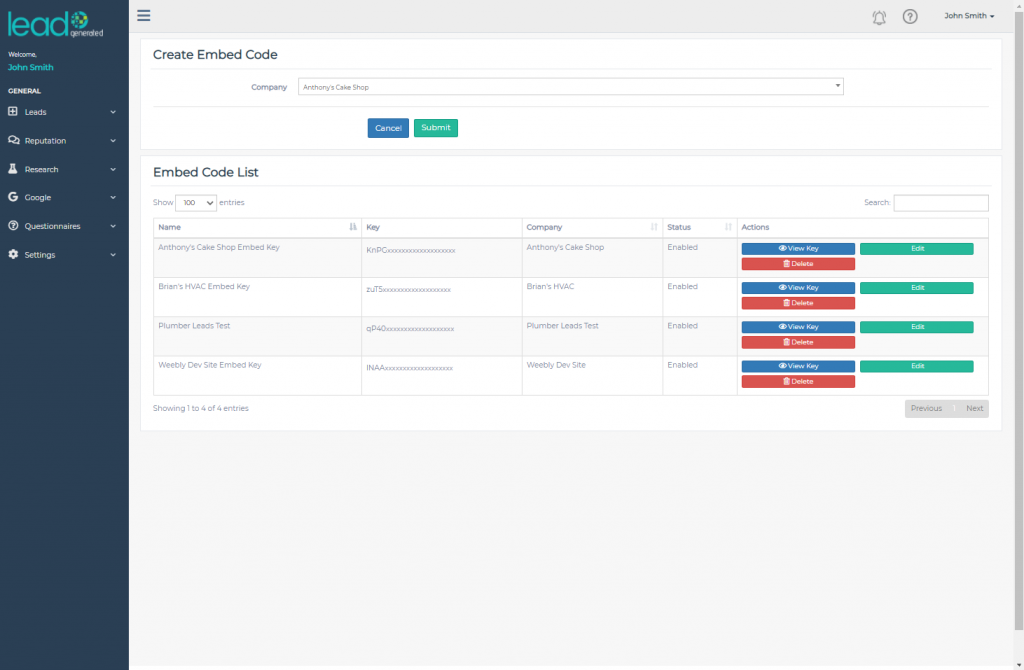
Click on the EMBED FORM button on the Embed box. This will take you to the Create Embed Code screen

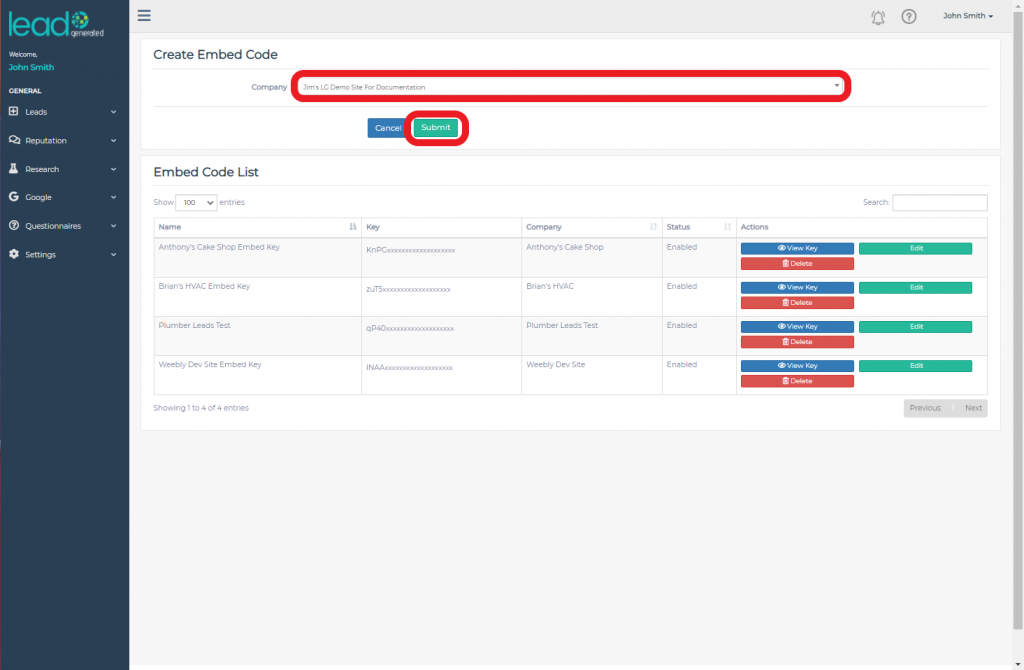
You need to first select the Company you wish to create an embed code key for. Click on the dropdown arrow at the far right hand side of the Company field.

This will present you with a list of all the companies you have setup. Scroll down to the one you want and select it.

With the company selected you will now need to click the Submit button to create a new embed code key.

A dialog box will pop up offering you three options. This is where you choose how the site should respond to the customer once they have completed and submitted your form.

The Redirect URL allows you to the page you would like to send users to have they submit a form, such as a thank you page.

For something more simple, the Success Message will simply display the text you enter here in place of the form when they have submitted it.

You only can add ONE of these options. You must not only complete the field but click on the option you want to use so that you have a blue circle next to it.

If you do not select any of the options, or you skip this part, the system will provide you with a generic “Thank you for Submitting” message.

For the purposes of this support guide, we will use the Success Message.

Finally, for those code gurus out there, you have the option of adding some HTML and CSS to further customize the style of the form.

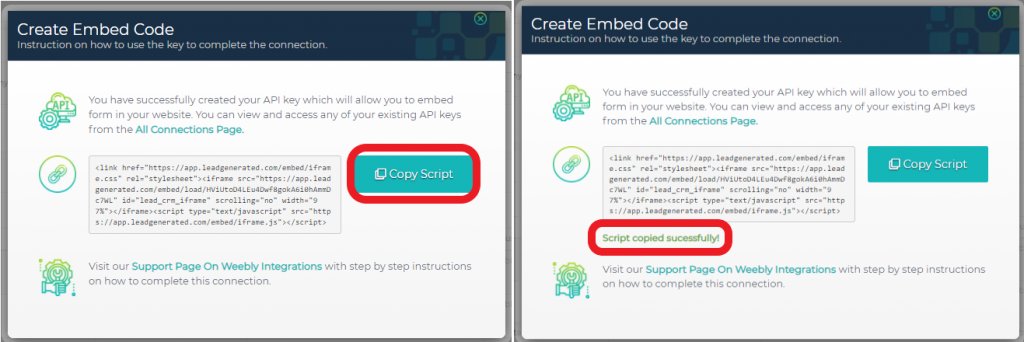
When you click on the Save button you will then be presented with a Create Embed Code pop up screen. This will have your newly created embed code key and instructions on how to use it.

Click on the Copy Script button will put the script into your system clipboard. It will also display a “Script copied Successfully!” message underneath the script window.

Embedding Code in Site

Now you have created the form and the embed script, you need to add it to your site.

Weebly

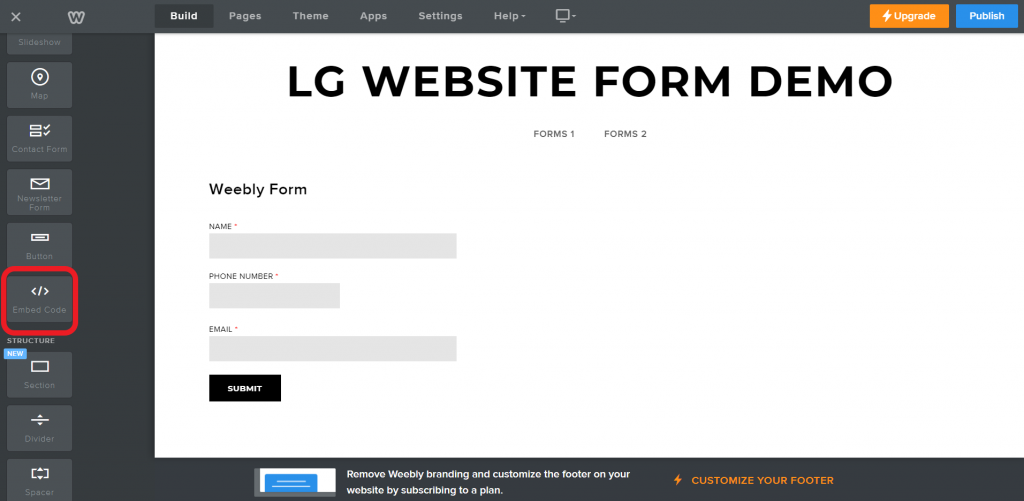
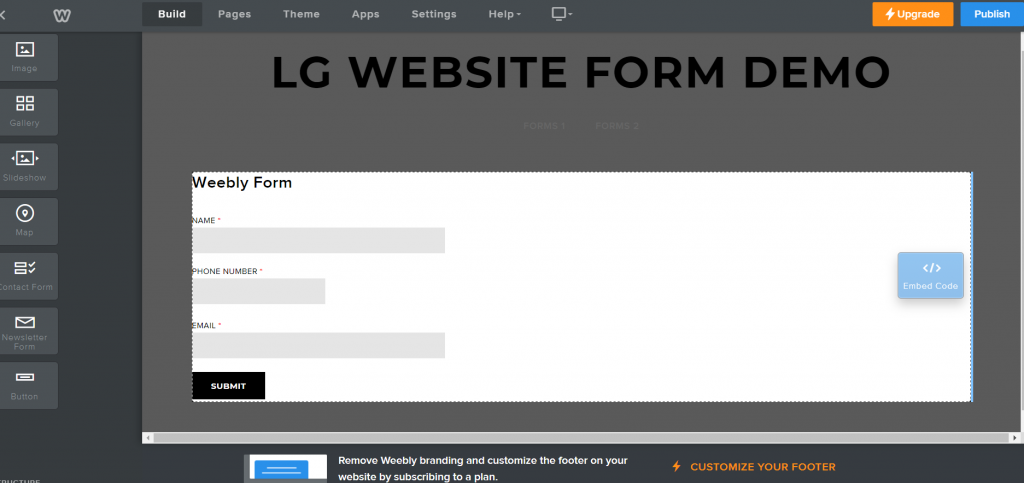
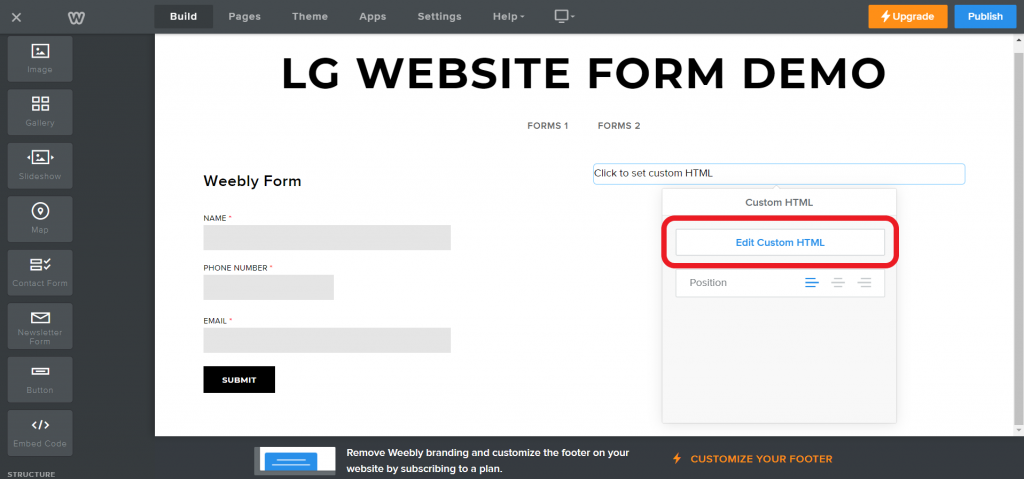
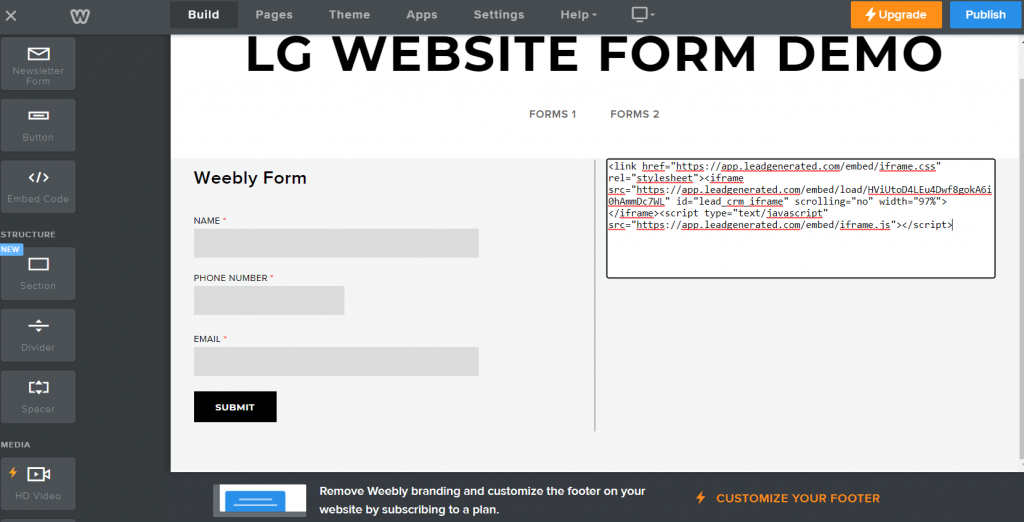
Scroll down the tools in the left hand side until you find the “</> Embed Code” widget. Drag this onto your page. Clicking on it will bring up the Custom HTML options. Select “Edit Custom HTML”, this will enable you to add the embed code you created earlier.

Paste the embed script from your form into the script area and click outside of the box. This will save the editing and connect to the Lead Generated system and fetch the form you created.

Don’t forget to Save or Publish your changes so you don’t lose them.

WordPress

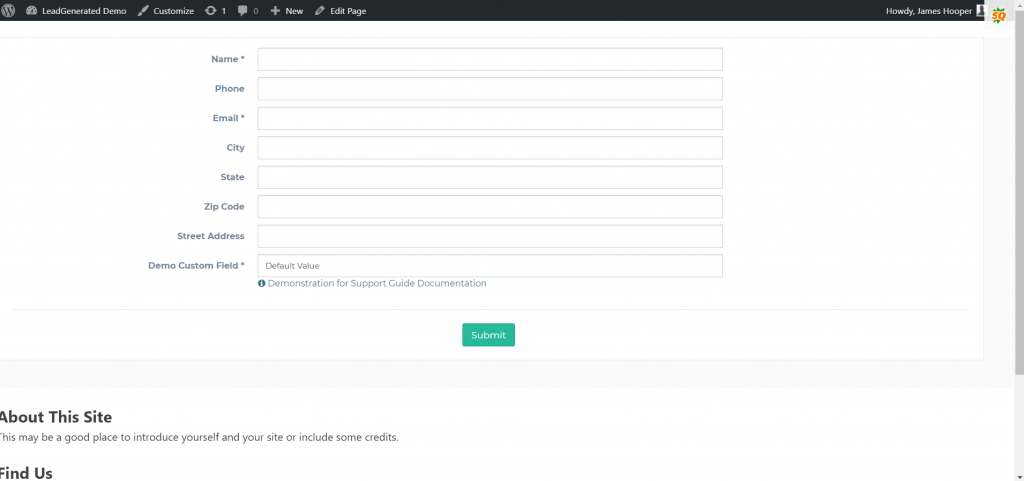
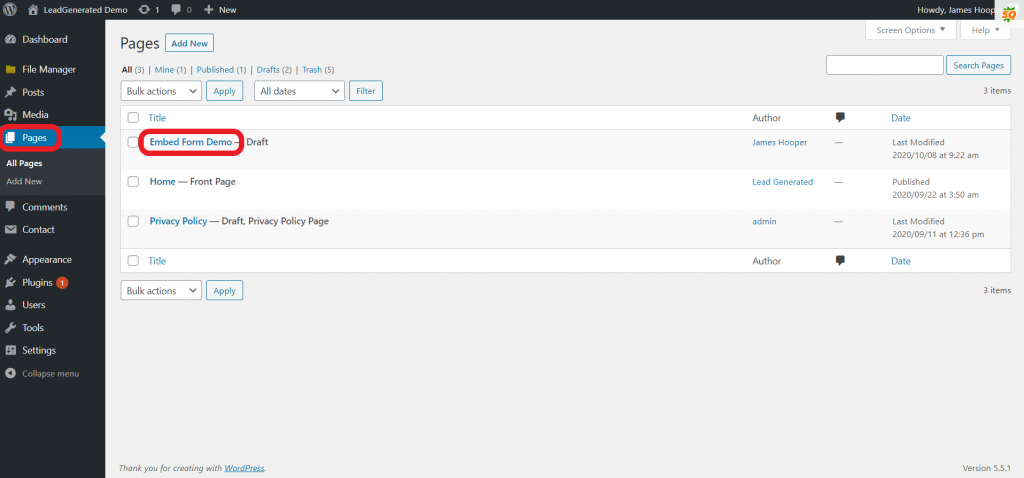
Click on Pages and select the page you want to embed the form on.

Select the “Text” tab and paste the embed form code into the text field.

Finally Click on the “Save Draft”, “Save as Pending” or “Update” button, depending what state your current page is in development, to make sure you don’t lose the changes.

Click on Preview and you will now be presented with your page displaying the new embedded form.

Website Forms Overview

Website Forms play an important role in the lead management module of Lead Generated. While the system is very user friendly, this is one place where there is a potential opportunity for confusion. We recommend that you watch the video overview and read this document to get a firm grasp on the role website from play.

For information about connecting the forms on your website please check out one of the following articles:
WordPress Website Connection
Embedded Form (Any Website Platform)
Zapier Website Connection (Any Website Platform)

Video Overview

Website Forms Purpose

Incoming Lead Organization

Website forms serve as a connector between your website and Lead Generated. We named this way because they connect to your website forms on your websites. As form submissions flow from your website through Lead Generated to your clients the website forms help to organize things and make sure the data is sorted into the correct columns within our system.

Embedded Forms

There are a few different methods for connecting your website to Lead Generated. This connection allows your form submissions to be instantly available in Lead Generated for analysis. Additionally, as form submissions flow through our system they are passed through our powerful spam filters. One of the website connection methods is to embed a custom form on your website which is designed within Lead Generated. The website forms play an important role in this process. Refer to this document for more on embedding a form on your website.

Manual Lead Intake Form

There are several ways to get leads into Lead Generated. One of them is to add a lead manually. Perhaps your client is using Lead Generated to add leads to the system as they come into their phone or someone from your team is fielding the calls. To manually add a lead expand Leads from the left navigation and selecting Add New Lead. On the next screen select the company and click next. You will be taken to the website form that is associated with your selected company.

Field Mapping

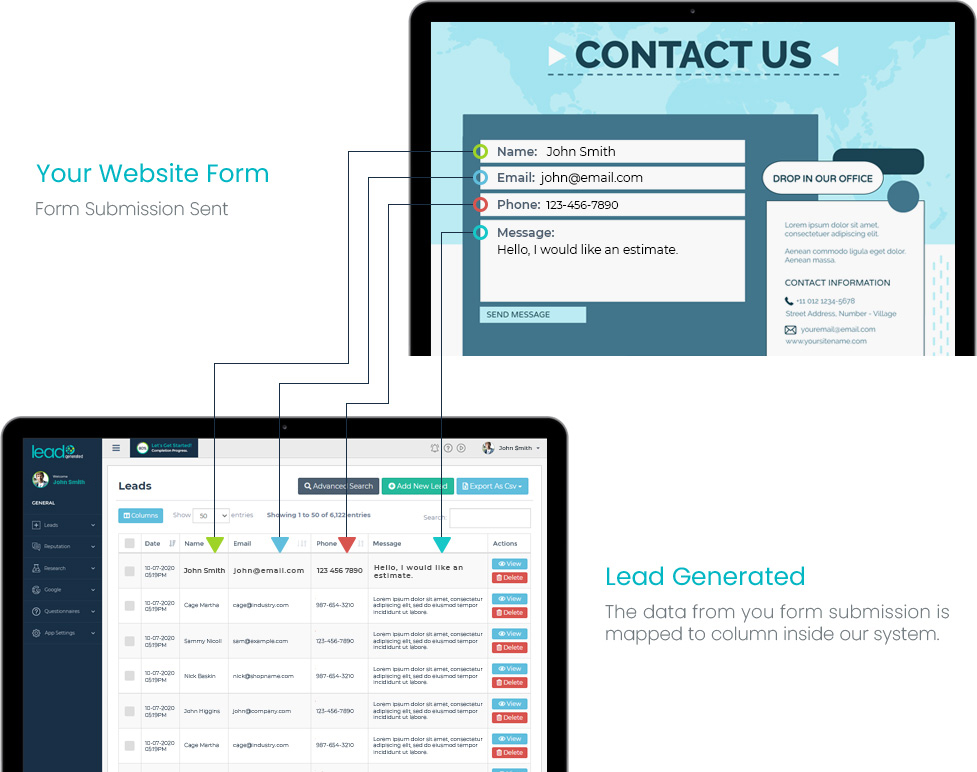
Website forms play an important role in the field mapping process. After making the connection between your website and Lead Generated any form submissions will appear in our system immediately. As the leads flow into our system we need to know where to store things. We refer to the process of teaching Lead Generated where to store the information from your form submissions as field mapping. Website forms allow us to create those places for the data to be mapped.

In the picture below, let’s pretend this form is a form on your website that you use to collect new leads for your business. You can see in the graphic, that the form is submitted and then it arrives inside of Lead Generated. As the arrows indicate the fields on your form are aligned with the fields inside of Lead Generated. The mapping process is what makes this possible. During the mapping process, you tell Lead Generated exactly which field you want to store the data from each field within our system.

Important Considerations

There are some very important things to keep in mind with website forms.

  • Every company has a website form. When you first created your company there was an option to select an existing form.
  • You can create as many website forms as you like.
  • You can use the same website form for as many companies as you like or have a unique one for each company.

Form Builder

  • Each field you create within the website forms form builder creates a new column. Avoid making duplicate columns as this can lead to confusion when viewing and searching columns.
  • Use the pre-defined fields whenever possible.
  • Custom fields have different icons and IDs associated with them.

Where are Website Forms?

Website forms are a part of the lead management module, so you can find them under the leads menu on the left side navigation.

  1. Expand Leads from the left navigation
  2. Select Website Forms 
  3. Select All Forms

Create a Website Form

There are two different ways you can create a new website form. You can start from scratch or you can duplicate an existing website form and then edit the new form.

Add a new website form:

  1. Expand Leads from the left side navigation
  2. Expand Website Forms 
  3. Click Add New Form


Duplicate website form:

  1. Expand Leads from the left side navigation
  2. Expand Website Forms 
  3. Click All Forms
  4. Click Duplicate next to the form you would like to copy

Edit a Website Form

  1. Expand Leads from the left side navigation
  2. Expand Website Forms 
  3. Click All Forms
  4. Click the Edit button next to the form you would like to edit.

This launches the form builder for the associated form.
Which Form Is My Company Using?

  1. Expand Settings from the left side navigation
  2. Expand Companies
  3. Click All Companies
  4. Click the Edit button next to the associated company.
  5. The form being used by this company is listed in the Website Form box.

Switch Website Forms

  1. Expand Settings from the left side navigation
  2. Expand Companies
  3. Click All Companies
  4. Click the Edit button next to the associated company.
  5. Select a new form from the Website Form dropdown box.